Tuesday, May 31, 2011

Nautical Twine Frame

I saw this artwork on Seaside Inspired, and immediately started scheming to make something similar for my mantle.  I didn't have any coral, or large shells or anything to add to the center, but I came up with another idea.


I had an old frame laying in a cabinet, and decided that it would be the perfect size for my project.  I started by cutting long sections of twine, and then just wrapped it around the frame.  I used a dot of hot glue on the backside of the frame at the beginning and end of each section.


I tried to include the corners in the sections, but the angles made it difficult. Once you get all four sides wrapped, just go back and fill in the corners.  You may have to put some glue under the twine so it sticks and doesn't slide off.   


This is what it will look like when you're done.


I wanted to add something white, so I cut some triangles out of some white linen fabric.  Then, I grabbed a lighter colored piece of twine and stapled the bunting to it.  The staples gave it a fun look, and to be honest - it took all of 2 minutes to attach - I love easy!


For the final look, I just figured out where I wanted the bunting to lay on the frame and hot glued the ends of the twine to the back.  Voila!  Easy, quick summer artwork.  Depending on how my final mantle looks, I may add something else.  I liked the simplicity of this though, so we'll see.


Have a great week!!  AND - a big Thank You to Amanda at Serenity Now for featuring my Sea Glass Monogram in her Weekend Bloggy Reading Party!!

Linking Up To:


Weekend Bloggy Reading


Designer Garden

Sunday, May 29, 2011

Featured Links from the First Ever Saturday Social!!

I want to start by thanking everyone who linked up to the very first Saturday Social!  I was so afraid that nobody would show up to my party (especially with the holiday weekend)!!  BUT - you came, and even braved the TEENINSY thumbnails.  I apologize for that - mama said you learn something every day, and in this case, it was the size settings for the thumbnail images.  As soon as the first link came in, I was emailing McLinky to find out how I could make them bigger (now!!).  I found out that it's possibly in the middle of a party, but at the expense of the first linkees - their images would get crazy pixelated.  So, I decided to leave them as is.  I promise though, next weekend, they'll look much better!!

All projects that were linked up were great, and I contemplated featuring everyone, but I thought that might take the fun out of the party.  In the end, I decided on my three favorites (this is way harder than I thought it would be - it's like choosing which child is your favorite!!).

The first is from Grey Luster Girl.  This baby girl (and mom) gift is amazing.  A beautiful onesie, matching hair clip, car seat canopy, bag, thank you cards an more!  Really amazing - I would love to receive this as a gift!!  


The second are these beautiful satin hairbows from Blissful Whimsy.  They look so soft - I just want to run my finger over the satin!  


And finally, these faux built-ins from Windgate Lane.  The stenciling is beautiful, and the shelves were transformed (and at a great price!).


Thanks again for linking up - come back next week!  I will have bigger thumbnails, I promise!  Can anyone recommend the best size to use??

Feel free to grab the button below for your blog if you were featured!


Have a great Memorial Day!!  I'm off to the lake!


Friday, May 27, 2011

Saturday Social - Week 1

Welcome to the first ever Saturday Social!

Here's how it works:

Link to a Specific Post - not just your blog homepage (we want to be able to find your creation!). Share any handmade craft, home decor, or recipe you would like (just no Etsy shops or items for sale please).

Grab a button below, or have a link back to my blog…so everyone can join in the party!

Be social and visit some of your Linky Neighbors - mingling makes for a better party!!


The party is open until midnight tonight!  Tune in tomorrow for my features!!


Friday I'm In Love

Welcome to my first edition of Friday I'm In Love!  I spend a ton of time looking through so many amazing blogs every week, and see so many wonderful things.  I thought I would start a weekly feature here to showcase some of them.  There are some seriously talented ladies out there.  I find myself frequently saying out loud, "How did they think of that!?!?!"

So without further ado, here are my top five posts that I fell in love with this week:

The first comes from Lolly Jane Boutique.  Kelli and Kristi did such an amazing job revamping this $4 garage sale find.  I want one of these Lemonade Stands for Addison!!  How adorable is that?


When I saw these Faux Starfish over at Craftberry Bush I felt like Lucy was answering my prayers!  Yes - you read correctly - she made the starfish!!  I was literally trying to figure out how to make these since they are so expensive to buy, and then I saw her post.  Lucy - girl - you read my mind!! 


Julie at Less-Than-Perfect Life of Bliss made this TO-DIE-FOR canvas rug for her porch!  I saw a previous version of this that she did, and have been wanting to try it forever (I need to get off my lazy butt and do it)!  BUT this new rug with the black belting around the edge is so super cute.


I loved everything about this Circus Birthday Party at Grey Luster Girl.  The bright colors are so cute - and look at those hats!!  Who wouldn't drool over bunting, pinwheels and sock monkeys?!?!?


So, I may be a wee bit biased about this next project.  Remember my fellow craft frenzy partner, Ginger??  Well - she started a blog this week, The Savvy Shanty.  Her first post ever - and this project is so amazing.  She got her hands on some chalk paint, and has made me a believer.  This bench is awesome!!  I told you all she was super talented!!  Now, go check out her blog!!!


That's it for this week - I hope you enjoyed pa-rousing as much as I did selecting.  Join me tomorrow for MY FIRST EVER LINKY PARTY!!!  Nope - I'm not excited at all!  :o)

Thursday, May 26, 2011

Sea Glass Monogram Tutorial

I am in the process of putting together my summer mantle - yay!!  Here's my first project for my display.  I started with this picture frame, which was one of my GoodWill finds a few months ago.  It didn't come with glass, so I have been saving it to use in a 3D Artwork project.  I painted it white a long time ago, and put it aside - I knew I would use it eventually!


I decided I would use burlap for the backdrop, but I wanted to add something to it.  Stripes seemed to be the thing, so I just taped these off and painted between the tape.


I remembered that I had this little set of shells, sand and faux seaglass that I had stashed in a closet.  I wasn't sure whether or not I would use the shells or glass, so I just played around with it until I decided on doing a monogrammed H.


Once I had it all laid out, I adhered the glass with some hot glue - super easy - it only took me like 5 minutes to glue everything down.


Here's the final product - I love it!!  So beachy!  I can't wait to see how it looks with the rest of the mantle!


Till tomorrow!  Can't wait to share my Friday I'm in Love favorites with you!


Exciting New Things

Happy Thursday, only one more day until the three-day weekend!  I have a little bit of news to share.  It's exciting for me, and I hope it will be for you too! 

Starting tomorrow - I have decided to do a weekly feature called "Friday I'm In Love".  I see so many wonderful crafts, recipes, and home decor being done out there, and thought I would choose my five favorite to share with you every week!

Then, on Saturday, I will have my very first Linky Party - Saturday Social!  You know the drill, but every Saturday you can link up your projects and then I'll pick some to feature on Sunday!  It's so exciting for me - I have been wanting to do this for awhile.  I hope you will come and share your projects!!

Tune in tomorrow - I have found some great things this week to feature!

Tuesday, May 24, 2011

Vintage Typewriter Notecards

Today was my new boss's birthday, so I decided to make her some personalized note cards for the occasion.  I had fun with this one.

I absolutely love the cream and black color combination, and thought this would be a great opportunity to use a vintage typewriter image that I have been saving for something special (found it at The Graphics Fairy).  I kept it simple, the design is clean, but I love the way it came out.  I used a typeset font to set it all off, and then decided to make them more girlie by lining the envelopes with a small polkadot pattern.

I went ahead and made a sample with my name on it to show you.  I'm excited though because even though I made her a whole set - I still have one to use for myself!!


I think this one may get added to my Etsy Shop!!


Linking Up To:

Photobucket


The Shabby Nest

Sunday, May 22, 2011

Time to Slow Down

I hope everyone had a great weekend!!  The past few weeks have been totally insane for me, and to be honest, I'm starting to get a bit overwhelmed.  I am two weeks into my new job, and it's going great, but I feel like I need to find my balance.  Not going to lie - my blog has been suffering a bit - I hope you all can stick it out with me as I go through these growing pains.  I would imagine it's going to take me about a month to settle back into a groove.  I have a lot to learn in my new job, and that has taken a large portion of my focus.  My to-do lists are piling up at home - projects galore that I want and need to complete have taken a back seat.  They WILL get done - I am sure of that, but it's definitely going to be a much longer process than it used to be.  The days of crafting all day have come and gone, but that doesn't mean I don't still love it!!  I just need to figure out how to do it all - job, family, crafts, business, and of course all of you!!

So, this weekend, I spent some much needed quality time with my family.  We spent the entire day on the lake yesterday, and let me tell you - it felt sooo good to sit back and relax.  I thought I would share some of our day with you.

It was totally hot - about 90 degrees yesterday - and the water was only 73.  It felt soooo cold!  Addie loves to swim though, and I was getting quite toasty so I figured, what the heck.  


Addison has turned into quite the lake rat.  I can't wait until we can start pulling her on water skis!!


That's hubby - I don't believe you've ever seen him before!  Well, now you get to see the lake hair, and the bare chest!!  (He's gonna kill me for posting this!)


I bought these cups yesterday because they were on sale.  I thought they were just regular party cups, until I realized that you can write your name on them!!  They have a thin wax that you just scrape your nail on.  Totally cool!!


Speaking of bad hair, please don't look at mine!  Yuck!


There came a point in the day when I told Addison she was on her own.  I couldn't get back in that freezing water.  She's resilient, apparantly!


Towards the end of the day we headed to a cove that we have named "Sunset Cove".  It's super close to our marina, so it's a straight shot in the dark.  We love it because it lives up to its name - and has an amazing sunset view!!


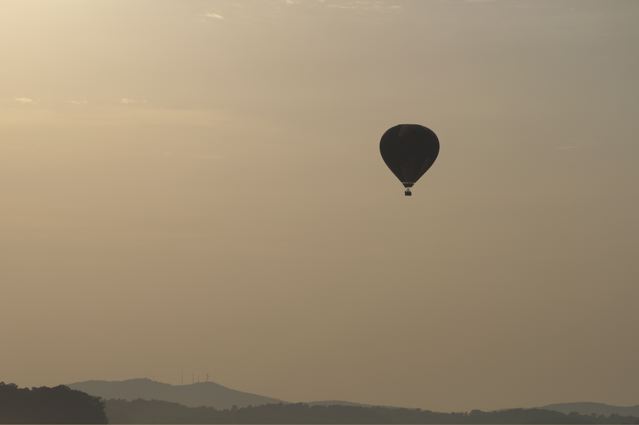
Not long after we anchored up in sunset cove, we saw a few hot air balloons flying overhead.  Amazing, and so beautiful!!


Addison and I decided to settle into a good spot for the light show.  Don't be mad mom - I let her take her life jacket off for a minute because she was really sweaty!!  
 

Ahh - this is the relaxation I needed...


It was an amazing day.  Much needed.  Please bear with me over the next few weeks.  I am coming up with a game plan for the blog.  I know I can do it all - I just need to get my system down.  I love blogging and crafting, and all of you!!  Let me know if there is anything you want to see, or would like me to change.  Any and all feedback is much welcomed!!